xmlns:b='http://www.google.com/2005/gml/b' xmlns:data='http://www.google.com/2005/gml/data' xmlns:expr='http://www.google.com/2005/gml/expr'> My Other Life: April 2015

Google Translate

Sunday, April 19, 2015

Sewing and Craft Room Update and Tips for Assembling

More work is happening across the street. I've been pretty lazy until recently. Finally went for a very short run and worked in yard a lot and put together these bookshelves this week.


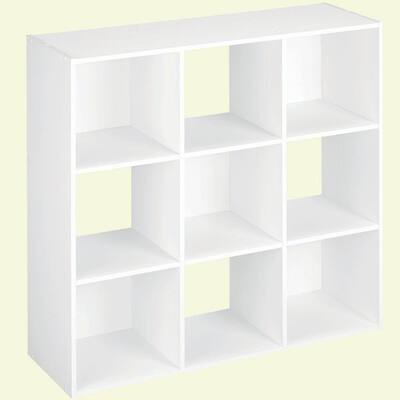
This unit from Home Depot (see link below) is 9 cubes each one.  But only 5 of the cubes have this white cardboard backing and the other 4 were left open. I read one of the customer reviews that she backed the open cubes with her own fabric covered cardboard. Awesome! That's exactly what I will do.  

But putting the first unit together went very poorly that day.  Several mistakes... attempted to do when I had only 2 hours to do it, didn't take my Vyvanse that day and couldn't stop thinking about my husband's earlier argument about these units. He said they would be "junk" but they're Martha Steward from Home Depot! OK I didn't say that last part out loud. If you consider particle board junk like him then he was right,  but honestly they'll do for now. When he finishes putting up all of our walls, building our kitchen cabinets, putting a deck on the house and finishing the fencing.... THEN he can make me some solidly built version of this. Until then these will work for $50 each on sale. 


To do a better job than I did putting it together I have a few pointers:

1. Carefully look at all the long boards and label them with a dry erase marker or pencil.

2. Either use a rubber mallet or only pound with your hammer through a rolled up towel when putting the peices together with the dowel rods. 

3. If you screw up and have to pull out a dowel and it's no good anymore? Nena's Hardware (Ace is the place) sells them individually for cheap. Menards and the big box stores you have to buy like 20 in a package. 

4. I also nailed my fabric covered cardboard backs on in addition to the backs they supplied. In fact, I made mine from the box the whole thing came in. But it was hard to always see where to nail after getting several on so you might want to nail all the backs that came with the kit on first as they were designed. Then add your fabric covered peices afterwards and try to have the nails line up with the ones you already pounded in for the others. (Sorry I should have taken pictures).


Thanks to "Ace is the place with the helpful hardware man." Since I had so much trouble with the first one and wrecked a bunch of the little dowels. Luckily they were $0.23 at Nena's for the 2 inch and $0.15 for the 1 inch. 

Here's how my room looks in Roomstyler!
This is after I paint it in the future. 

Maybe he can at least make me a craft table this year?
So I finished the 2 units and unpacked all my "craft bags." A bag of knitting stuff, boxes of patterns, bag of watercolor stuff, bag of washi tape... you get the picture.
Pat looked at this and said it looks like your lab. 

Moved over my Ott light with the magnification lens and clip. 

Ta Dah!

I should also mention that the units are stackable and there are holes to attach them to each other with dowels as well. Then you can also use an enclosed bracket to attach it to the wall to keep it from tipping. Since I'm not all too confident in my finished product's sturdiness I did just that.

My husband is just a music-woodworking-running snob! He'll tell you that himself.

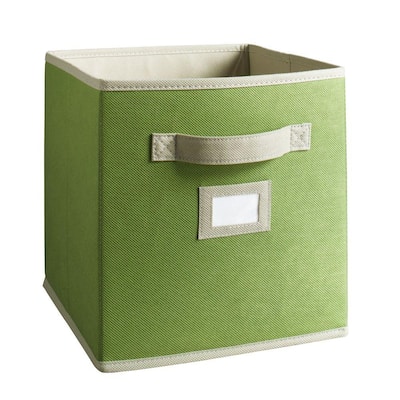
Oh and the bins came from Home Depot as well.

Saturday, April 11, 2015

Mixed Media or Paper Art... Collage... Whatever you want to call it!

It's fun and a great way to recycle some of the many magazines and garden catalogs I have laying around. In fact the garden catalogs made these amazing strips, especially Annie's Annuals catalog. So much so I feel like I should send her this canvas. But I also used Money magazine and Backpager magazine so any magazine would do. I started to make these "coils" by rolling thin strips of magazine pages. Not really easy to do and didn't look like anything from the side view. I did keep a few of those and use them as eyes and such. Then I looked up how other people did it and found a youtube video where they made first a straw and then she mentioned rolling it through a pasta maker. That was how I made the next 20 or so. Then I thought wouldn't they look even cooler if they were crimped and went and got a hand held one from Michael's for $20 regular price and used my 40% off coupon! DEAL!
Not crimped but made from straws.

Pasta machine for rolling flatter.

Bunch of straws these all came from magazines.


After buying the crimper. Ones on left are crimped and ones on right not.


First put on with rubber cement.

Rolling, rolling, rolling...

So you get the idea. I made a video but it was terrible so I'd have to redo it if anyone wants to see an action shot of making the straws. Several people bought fancy dowel rods and such I used either a pencil or longer paint brush handle (an art one of course) worked great. I used Elmer's glue, craft tacky glue and glue stick. I'd say Elmer's was best. The glue stick surprised me as to how thick it made the straws and hard to crimp. The Tacky glue took longer to dry and was messier. BUT nothing was as messy as the rubber cement. I was using that just for attaching to the canvas in case I didn't like them but I switched halfway through to Elmer's and that worked better. Rylie and I actually did that part together so this was a team effort. Later I found I could peel them off regardless of what I used and abandoned the rubber cement that may have been killing our brain cells. I "modge-podged" over it when I had half of them on, all of them on, and again some areas 3 or 4 times and again after painting some swirlies. I'm sure it may still need more Modge Podge. I'll take it to Jeanna Fearon, my Art Yoda, and see what she thinks.

So here's the finished (maybe finished) result:

Ok you want to see how it's really done. This woman is a professional and she's not recycling but buying this fancy paper from Thailand. She rolls it multiple laters and cuts with gardening shears. BUT WOWZA is the results worth it or what!

Isn't that awesome!!!! Holy crap. I am not sure I have that kind of patience as if....I saw one of hers before making mine that made me think underwater but it was titled 'Tidal'. But this one I saw after I started and it is indeed titled 'Reef' so clearly this method just screams underwater reef. Then she has some more that are more like trees. You know how I feel about trees.

And then purple and green too? If anyone wanted to buy me some art this would be top of my list for sure. It's breathtaking to me.